just links to other sites. no original postings, no fresh ideas here. images link to their source. have fun!

Sunday, May 30, 2010

snail bread


"After got back home from that bakery, I felt like to slow down my pace, so made myself some snail bread ... :) :)"

Saturday, May 29, 2010

Funnel Cakes


Egg-Free Funnel Cake
Summer is just around the corner and with Memorial Day being the unofficial start of the summer, I thought why not have a little fun and make some oh-so scrumptious funnel cakes for this weekend. Oooooh....YUM!

If you've never had a funnel cake before, it's basically a deep-fried pastry topped with powdered sugar, fruit or honey. It's made by pouring batter through a funnel and deep-frying it in oil. The Pennsylvania Dutch popularized this sweet treat and is now commonly found at state fairs and carnivals all over the United States.

Since my son can't enjoy the funnel cakes at the San Diego County Fair, I thought I might as well figure out how to make them egg-free at home. So I took what was basically my egg-free pancake batter (I'll be posting that recipe soon), tweaked a few ingredients and voila! We have egg-free funnel cakes :-)

The first time I made the funnel cakes, I actually used a funnel with a stopper, but it got too messy. So I switched to a piping bag with a round tip and it made pouring the batter in a circular pattern much easier. I'm pretty sure I could've used a Ziploc bag with the same results. I checked online and I found a funnel pitcher. That would've been handy.

First, I tried them dusted with powdered sugar. YUM! Then I tried them drizzled with honey. WOW! And then I tried them with whipped cream and fresh strawberries. OMG!

Hmmmm..... Maybe this weekend, I'll try them topped with ice cream (with a cherry on top).

Egg-Free Funnel Cakes
Makes about 6 to 8 funnel cakes
Allergy Note: Contains wheat and dairy ingredients

3 cups flour
2 tsp baking powder
1/2 tsp. salt
3 cups milk
4 Tbs. orange juice
oil
powdered sugar

Heat oil in a skillet or deep fryer to 375 F degrees. (Tip: Another way to test if the oil is hot enough is by dropping a small amount of batter into the oil. If the batter starts bubbling and rise to the surface quickly, then the oil is hot enough. If the batter bubbles slowly and doesn't rise right away, the oil isn't hot enough)

Sift together flour, baking powder and salt. Mix in milk and orange juice. Using a funnel, pour batter in overlapping circles then crisscross. Fry till golden brown around the edges. Use tongs to gently flip over gently and cook the other side for one minute. Drain with paper towels and dust with powdered sugar.

Friday, May 28, 2010

rettgrayson's African Flower Cushion

African Flower Hexagon


1st Round: Chain 5 stitches and join with slip stitch to form a ring.
2nd Round: Chain 3 (count as first dc), 1 dc in ring, (1 chain stitch, 2 db in ring) 5 times, 1 chain stitch, join with slip stitch to first dc (6 shells).
3rd Round: Join next colour and crochet in each of the 6 chain spaces: (2 dc, 1 chain stitch, 2dc). Join with slip stitch to first dc.
4th Round: Join next colour and crochet 7 dc in each of the 5 chain spaces. Join with slip stitch to first dc.
5th Round: Join next colour and crochet 1 sc in each of the next 7 dc, except between the 2 dc of the third row where you do a dc which you join to the 3rd round in order to form the petal - (7 sc and 1 dc) 6 times.
6th Round: Join next colour and crochet 1 dc in each sc, except for the middle of each petal where you crochet (1 dc,1 sc, 1dc) in each petal. Tie off.

Toasted Coconut Rice Krispie Treats


Toasted Coconut Rice Krispie Treats
Makes about 24 squares

I originally intended to use all toasted coconut marshmallows to make these treats, but with only half a bag left I wasn’t able to find any more. I made my batch with half regular and half toasted coconut marshmallows. Use whatever combination of marshmallows you like, so long as it totals 10 ounces. I used 60% Ghirardelli bittersweet chocolate chips for the glaze.
Ingredients

Cooking spray for greasing the pan
3 tablespoons unsalted butter
10oz (1 bag) of regular-sized marshmallows, original or toasted coconut flavor (or both)
1/2 cup shredded sweetened coconut
1 teaspoon coconut extract
5 cups Rice Krispies cereal
1 cup toasted shredded coconut*
3 ounces (about 1/2 cup) bittersweet chocolate chips, melted
Directions

* To toast coconut, spread shredded coconut in an even layer on a cookie sheet and bake at 300F, stirring every few minutes, for 10-15 minutes or until coconut is golden brown. Don’t walk away from the oven! The coconut will brown very quickly, so keep an eye on it. Set aside to cool.

Line a 9×13 inch pan or baking dish with foil, leaving a few inches of overhang on each side. Grease the foil very well with cooking spray.

In a large saucepan or pot, melt butter. Add marshmallows and heat over medium-low heat, stirring until melted. Stir in shredded coconut and coconut extract. Remove from heat. Add Rice Krispies and stir until thoroughly coated.

Spread Rice Krispie mixture into prepared pan. With the back of a buttered spatula or using a sheet of waxed paper, press mixture firmly into an even layer. Sprinkle with toasted coconut and press lightly to adhere to the top of the treats.

In a small, heatproof and microwave safe bowl, heat the chocolate in the microwave on high for 30 seconds. Stir, and return to microwave, heating in 15 second intervals and stirring well between each heating, until chocolate is melted. Drizzle melted chocolate over the treats in the pan.

Cool at room temperature until chocolate hardens. Once cool, lift treats out by the edges of the foil. Cut into squares and enjoy feeling like a kid again.

cupcake cupcake toppers


(theyre actually miniature reeses cups) via.

Thursday, May 27, 2010

Strawberry sheet cake


Strawberry sheet cake
Ingredients:
12 oz .fresh strawberries, stems removed and chopped (about 3 cups)
2 cups of sugar plus 2 teaspoons
2 cups of flour
2 sticks of butter (1 cup)
2 eggs lightly beaten
1/2 cup of buttermilk
1 teaspoon of baking soda
1 teaspoon of vanilla

Method:
Over the chopped strawberries, sprinkle 2 teaspoons of sugar and 1/4 cup of water. Let them sit for an hour at room temperature so they can release some of their juices. The berries should reduce to about 1 1/2 cups. In a blender of food processor, crush the berries on a low speed for a few seconds—you want them juicy but still with some texture. Take 1/2 cup of the strawberry mixture for the frosting and leave the remaining crushed strawberries for the cake.

Preheat oven to 400 degrees.

Sift the sugar and flour together in a bowl.

Melt the butter on low in a saucepan and then whisk it with the eggs, buttermilk, vanilla and baking soda. Add the liquid to the flour and then stir in one cup of the crushed strawberries.

Pour batter into greased 9x13 inch pan and bake for 20-25 minutes. Cake is done when a knife comes out clean from the center. Let it cool and then frost with the strawberry cream cheese frosting (recipe below).

Note: The cake will be a little brown. This, I hear, is because of the alkaline reaction of the ingredients. Do not be alarmed!

Strawberry cream cheese frosting
Ingredients:
1/4 pound of butter (1 stick) at room temperature
8 ounces of cream cheese at room temperature
3 cups of powdered sugar
1/2 cup crushed strawberries
2 teaspoons of lime juice (about half a lime)
1/4 teaspoon lime zest
1 teaspoon vanilla extract

Method:
Whip together the cream cheese and butter until smooth. Slowly add the powdered sugar until blended. Add the strawberries, lime juice, lime zest and vanilla. Spread over cooled cake.

Note: Depending on how juicy your berries are, your icing may be runnier than usual. If this is the case, I'd add more cream cheese to thicken it up.

Wednesday, May 26, 2010

stuffed french toast


Stuffed French Toast
A wonderful twist on a breakfast classic!

Ingredients

* 1 loaf French Bread
* 3 Tablespoons Any Flavor Fruit Spread (You Can Also Use Jelly, Jam, Or Fresh Fruit)
* ½ packages Cream Cheese (4 Oz), At Room Temperature
* 2 whole Eggs
* 1 Tablespoon Cinnamon
* ½ cups Skim Milk
* 2 Tablespoons Butter

Preparation Instructions

Heat skillet or electric griddle to 325 to 350 degrees.

Cut french bread into 2-3 inch wide slices. Then, with a paring knife, go back and cut halfway into each slice, in the center, creating a ‘pocket’ that your fruit mixture can be stuffed into.

In a bowl, place the room temperature cream cheese and three tablespoons of fruit spread of your choice. (I used all organic blueberry spread in the picture.) Combine well.

In a separate bowl, break 2 eggs; add cinnamon and milk and combine well.

Now, take fruit mixture and stuff into the ‘pockets’ of your french bread slices. Place on a baking sheet.

When done stuffing each piece of bread, completely coat each piece in egg mixture. Make sure all sides are covered. Do all pieces before starting to fry.

Put 2 tbsp (you can use less!) of butter into a hot skillet and melt completely. Add all of the bread to the skillet and cook roughly about 3-6 minutes on each side, until it reaches a nice golden brown. You want to make sure the cream cheese mixture heats through.

When done cooking, serve immediately with butter and syrup.

Valentine's 5-Layer Finger Jello


Valentine's 5-Layer Finger Jello
Strawberry, Cherry and Raspberry Jell-O with milk filling

7 Layer Finger Jello

4 pkg. 3 oz Jello (lemon, orange, lime, strawberry)
4 pkg. Knox unflavored gelatin
1 can sweetened condensed milk

1. Mix 1 pkg flavored jello with 1/2 pkg of unflavored gelatin. Add 1 cup boiling water. Stir to dissolve. Cool to room temp and pour into 9 x 13 glass pan. Refrigerate for 15 minutes (and make sure your refrig is level!)

Valentine's 5 Layer Finger Jello
2. Mix 1 can sweetened condensed milk with 1 cup boiling water. In a small bowl, sprinkle 2 pkg unflavored gelatin over 1/2 cup cold water. Let stand a few minutes and then add 1/2 c boiling water to dissolve gelatin; add to milk mixture and stir to combine. Cool to room temp and pour 1 cup of milk mixture over first layer of jello. Refrig for 15 minutes.

3. Repeat for next three flavors. Let jello set. Cut and serve!

coffee jello


Vietnamese Coffee Jello
via The Food Librarian

1/2 cup cold water
2 cups strong coffee
1 (14oz.) can sweetened condensed milk
3 packages of Knox unflavored gelatin

Place 1/2 cup cold water in a medium bowl. Sprinkle 3 packages of unflavored gelatin over the water; stir to combine. Let this mixture set for about 10 minutes, until the gelatin blooms. Meanwhile, prepare 2 cups of strong coffee. (I used 8 tablespoons of ground coffee for 2 cups of water.)

Stir the hot coffee into the bloomed gelatin until the gelatin is completely dissolved.

Stir in the can of sweetened condensed milk.

Pour the combined jello mixture into an 8x8 pan (you could use a larger pan for thinner jello cubes). Place in the fridge for 2-4 hours, until gelatin is completely set.

Cut into 1-inch cubes and serve, or store in an air tight container in the refrigerator until ready to serve.

Peaches & Cream Jello

Broken Glass Jello

Wednesday, May 19, 2010

Soda Pops Popsicles


Soda Pops Popsicles

Super quick and easy, this is a great project to share with kids in the summertime. Orange soda and root beer are both classic partners for creamy vanilla ice cream, but any soda you like will work well.

Ingredients for six 4-ounce popsicles
2 cups soda (orange, root beer, grape, etc)
1 cup good-quality vanilla ice cream, softened

Directions

1. Place the soda and ice cream in a blender, cover with a lid, and liquefy.

2. Fill popsicle molds according to the manufacturer’s instructions.

3. Place in the freezer for 4–6 hours.

4. Remove popsicles from the freezer and hold them under hot running water for 5–10 seconds until their molds release. Enjoy immediately.

vanilla grapefruit and strawberry lemon paletas, popcycle


vanilla grapefruit and strawberry lemon paletas, popcycle

salty cucumber lime and orange blackberry paletas, popcycle


salty cucumber lime and orange blackberry paletas, popcycle

Monday, May 17, 2010

where cursors come from


Mochi, custard, and shave ice


custard bowl shave ice on top of flan-like custard, flavored with lilikoi and li hing mui and added mochi. from waiola, honolulu

ichigo daifuku


made ichigo daifuku yesterday for the first time and then again today.

overall, i was pleased by how easy it was to make and how delicious the resulting sweet was for the amount of effort (not much!), as long as you take care to get the best strawberries.

… … …

notes.

the anko was so wet and sticky, very difficult to handle. yesterday i put the anko into a nonstick fry pan to try to evaporate a bit of the water to make it a bit easier but it didnt really work.

last night i read online that i should try it with refrigerated anko and sure enough, the cold made it easier. not totally, but much better than yesterday. i also thought the canned anko was too sweet. but im unwilling to make my own anko, so ill put up with the sweetness.

the recipe i used used 100 g shiratamako for 6 strawberries, but i was unhappy with the fruit/anko/mochi ratio. too much mochi. so this time i divided the dough from 100 g shiratamako into 8 pieces. much more fruit per sweet. the strawberries i used were really quite small, though.

i was surprised by how easy it is to make the mochi. i was always kind of intimidated, worried about handling the hot stuff, but it actually cools down really quickly.

strawberry season is here but wont last more than a month, so i will probably make this in two weeks or so to say good bye to strawberries for the year. but i will be making daifuku again after strawberry season is over. mikan, budou, cafe au lait as well as kuri daifuku are all in the plans.

oh. and i will definitely try freezing whipped cream and adding that to the ichigo daifuku when i make it again. ill need to have the technique down before i tackle cafe au lait.

i am hoping by the end of this year, with all my new experience, my daifuku will also be more attractively put together.

Sunday, May 16, 2010

Granny’s Chocolate Cobbler


My Granny’s Chocolate Cobbler

This cobbler brings back childhood memories of summer time at my granny’s house. She would make this decadent dessert to go with the homemade vanilla ice cream. I don’t know of anything that melts ice cream better.

Ingredients

* 1 cup All-purpose Flour
* 2 teaspoons Baking Powder
* ¼ teaspoons Salt
* 7 Tablespoons Cocoa Powder, Divided
* 1-¼ cup Sugar, Divided
* ½ cups Milk
* ⅓ cups Melted Butter
* 1-½ teaspoon Vanilla Extract
* ½ cups Light Brown Sugar, Packed
* 1-½ cup Hot Tap Water

Preparation Instructions

Preheat oven to 350 degrees.

First stir together the flour, baking powder, salt, 3 tablespoons of the cocoa, and 3/4 cup of the white sugar. Reserve the remaining cocoa and sugar.

Stir in the milk, melted butter, and vanilla to the flour mixture. Mix until smooth.

Pour the mixture into an ungreased 8-inch baking dish. I prefer my small oval Corning Ware glass dish.

In a separate small bowl, mix the remaining white sugar (it should be 1/2 cup), the brown sugar, and remaining 4 tablespoons of cocoa. Sprinkle this mixture evenly over the batter.

Pour the hot tap water over all. DO NOT STIR!

Bake for about 40 minutes or until the center is set.

Let stand for a few minutes if you can hold yourself back. Serve with homemade ice cream using the gooey sauce to spoon over all.

Saturday, May 15, 2010

Kum PenCut Pen-Style Scissors

Kum PenCut Pen-Style Scissors

François Payard's Chocolate Meringue Tarts in miniature

chocolate pudding


CHOCOLATE PUDDING, From Baking From My Home To Yours

Makes 6 servings

2 1/4 cups whole milk

6 tablespoons sugar

2 tablespoons unsweetened cocoa powder

2 tablespoons cornstarch

1/4 teaspoon salt

1 large egg

2 large egg yolks

5 ounces bittersweet chocolate, melted and still warm

2 tablespoons unsalted butter, cut into 4 pieces, at room temperature

1 teaspoon pure vanilla extract

Getting Ready: Have six ramekins or pudding cups, each holding 4 to 6 ounces (1/2 to 3/4 cup), at hand.

Bring 2 cups of the milk and 3 tablespoons of the sugar to a boil in a medium heavy-bottomed saucepan.

While the milk is heating, put the cocoa, cornstarch and salt into a food processor and whir to blend. Turn them out onto a piece of wax paper, put the remaining 3 tablespoons sugar, the egg and egg yolks into the processor and blend for 1 minute. Scrape down the sides of the bowl, add the remaining 1/4 cup milk and pulse just to mix, then add the dry ingredients and pulse a few times to blend.

With the machine running, very slowly pour in the hot milk mixture. Process for a few seconds, then put everything back into the saucepan. Whisk without stopping over medium heat - making sure to get into the edges of the pan - until the pudding thickens and a couple of bubbles burble up to the surface and pop (about 2 minutes). You want the pudding to thicken, but you don't want it to boil, so lower the heat if necessary.

Scrape the pudding back into the processor (if there's a scorched spot, avoid it as you scrape) and pulse a couple of times. Add the chocolate, butter and vanilla and pulse until everything is evenly blended.

Pour the pudding into ramekins. If you don't want a skin to form (some people think the skin is the best part), press a piece of plastic wrap against the surface of each pudding to create an airtight seal. Refrigerate for at least 4 hours.

berries


berries

strawberries


strawberries
They’re tiny and pack an amazing amount of flavor, so it’s a shame to do anything but snack on them. No sauces, shakes, or baking… just enjoying a sweet little reminder that strawberry season will be here soon enough.

embroidered wonder bread


embroidered wonder bread

slipper genie for men. black and only $12


slipper genie for men. black and only $12

slipper genie, $5-$7.50. also in lime green.


slipper genie, $5-$7.50. also in lime green.

strawberry ginger ale terrine


strawberry ginger ale terrine

homemade ginger ale


homemade ginger ale

snacks 'n jaxson


snacks ‘n jaxson featuring… jaxson de box

this game took maybe $100 from me


this game took maybe $100 from me

coffee loaf


coffee loaf

strawberry mascarpone mousse cake


strawberry mascarpone mousse cake

Mango and Passion Fruit Jam


Mango and Passion Fruit Jam

Ingredients:
(yields about 300ml of jam)

500g mango flesh (use firm, just ripped fruits)
50g passion fruit pulp
200g granulated sugar*

Method:

1. Place passion fruit pulp in a sieve, drain remove the seeds and retain the juice.
2. Cut mango into small chunks and roughly mash with a fork. Place mashed mangoes, passion fruit juice and sugar in a stainless steel pot or a large saucepan. Mix well. (Note: use non-reactive pots made with stainless steel, glass or enamel, avoid pots made with copper, aluminum or cast iron which would react with acid).
3. On medium heat, stirring constantly with a heat-proof spatula or a wooden spoon, bring the mixture to a full rolling boil (when the bubbles do not stop or lessen when you stir it). Once the mixture starts to boil, skim away any excessive foams or bubbles, stirring constantly all the time.
4. Keep at a slow rolling boil for another 5 ~ 10 mins, stirring constantly till the mixture thickens, becomes clearer and transparent (no more foams).
5. Remove from heat. The jam will be a little runny when hot but the consistency will be just right after it has cool off.
6. Ladle hot jam into hot sterilised jars, fill to the brim. Secure lids. Let cool. Unopened jam will keep up to 3 months if stored in fridge or in a cool, dark cupboard. Once opened, store in fridge and best consumed within 3 weeks.

Note:
*Do not reduce the sugar, as the amount is required to preserve the jam.

Wednesday, May 12, 2010

Cheese Flautas with Cilantro Pesto


Cheese Flautas with Cilantro Pesto

- serves 3 -
Adapted from Martha Stewart.
Ingredients

1/4 cup extra-virgin olive oil
2 garlic cloves, sliced
3/4 cup hulled pumpkin seeds
1 cup fresh cilantro, chopped
2 tablespoons lime juice
salt and pepper
8 corn tortillas
1 1/2 cups grated Monterey Jack cheese
1/4 cup peanut oil
Salsa

Procedure

1. Place a skillet over medium heat. Soften the tortillas on the skillet for a few second each side. Set aside. Pour 2 tablespoons of the olive oil into a skillet set over medium low heat. Add the garlic and cook for 1 minute. Then add the pumpkin seeds and cook for 2 to 3 minutes, until browned. Scrap into a food processor along with the cilantro, lime juice, and the rest of the olive oil. Process until smooth.

2. Place a tablespoon or so of the pesto onto each tortilla. Sprinkle each with the cheese. Roll up the tortillas, and place them seam side down on a plate.

3. Pour the peanut oil into a skillet set over medium heat. Place 4 our of the tortillas seam side down in the oil. Cook for a minute and then flip. Cook for another minute, and then drain on a paper towel. Repeat with the other tortillas.

4. Serve with salsa of your choice.

roy street coffee and tea

roy street coffee and tea

photo story of starbucks concept cafe, roy street coffee and tea. beer, cheese plates, sardine plates, granola and wines.

Cheese Biscuits


Cheese Biscuits
source : Food Network

Ingredients :
2 cups self-rising flour (gue pake all purpose flour)
1 teaspoon baking powder
1 teaspoon sugar
1/3 cup shortening
3/4 cup grated sharp Cheddar (gue pake permessan)
1 cup buttermilk (gue pake yogurt)
Salt
1/4 stick butter, melted

Directions :
Preheat oven to 350 degrees.

In a medium bowl, mix flour, baking powder, salt, to taste, and sugar together using a fork; cut in shortening until it resembles cornmeal. Add cheese. Sir in buttermilk all at one time just until blended. Do not over stir.

Drop by tablespoonfuls, or use an ice cream scoop, onto a well-greased baking sheet. Brush dough with melted butter. Bake for 12 to 15 minutes.

French Lemon Cream Tart


French Lemon Cream Tart

This is just superb! Way better than my epidermis! I recently purchased Dorie Greenspan's Baking:From My Home To Yours and I ADORE this cookbook to no living end. It's not only great for straight-up food porn, but the writing is excellent, the details are spot-on, and the glossary is invaluable. And this tart? Fun to make, a treat for the senses (the zest is divine) and a learning experience that is guided by Dorie's well placed instructions. The Lemon Cream is adapted from none other than Pierre Herme himself and could be used in a million ways - pastry, toast, cakes, pies, cupcakes, tartlets - you name it. It's creamy and light - yet rich and decadent too - and balances sweetness and tartness just right, as far as I can tell. And the crust is crisp with just enough "give" - and sweet enough to be a shortbread all on its own. Delicious.

Crust
1 1/2 c. all purpose flour
1/2 c. powdered sugar
1/4 tsp. salt
9 T. unsalted cold butter, cut into small pieces
1 large egg yolk

Put flour, sugar, and salt in processor and pulse to combine. Add butter and pulse until mixture has pieces the size of peas and smaller. Break up the yolk and add a little at a time, pulsing after each addition. After the egg is added, pulse for 10 seconds at a time until the dough forms clumps. Then, turn the dough out onto a surface and very lightly knead the dough just to incorporate any dry ingredients.

Butter a 9-inch tart pan with a removable bottom and press the dough evenly into the bottom and up the sides, saving a bit of leftover dough for any patching of cracks that may occur during baking (optional). Freeze the dough for at least 30 minutes before baking (can be longer). Center a rack in the oven and preheat to 375F. Butter the shiny side of a piece of aluminum foil and place the buttered side tightly against the dough. Put the tart pan on a baking sheet and bake for 25 minutes. Carefully remove the foil. If the crust has puffed, press down those areas with the back of a spoon. Bake for another 8 minutes or until crust is firm and golden brown. Transfer to cooling rack and allow to come to room temperature.

Lemon Cream
1 c. sugar
grated zest of 3 lemons
4 large eggs
3/4 c. fresh lemon juice (4-5 lemons)
2 sticks + 5 T unsalted butter, cut into T size, room temperature

Needed: blender, instant read temperature, strainer

Bring a few inches of water to a simmer in a saucepan. In a large heatproof bowl (off the heat, at this point), combine sugar and zest between your fingers until grainy. Whisk in eggs, then lemon juice. Set bowl over pan and whisk once the mixture becomes tepid. Cook mixture until it becomes 180F. You must whisk continuously to prevent the eggs from scrambling. The mixture will become foamy, then thicken as it gets closer to 180F - and be warned, it takes at least 10 minutes.

When it reaches 180F, strain the cream into the blender and discard the zest. Let the cream cool, stirring occasionally, to 140F, about 10 minutes. Turn blender to high and add butter, 5 pieces at a time, scraping down sides as needed. Once all the butter is in, blend for 3 more minutes. Pour the cream into a container and place a piece of plastic wrap on the surface of the cream; refrigerate for at least 4 hours. Then, loosen cream with a whisk and spoon into tart shell. Serve immediately or refrigerate. ENJOY!

tarte aux fraises


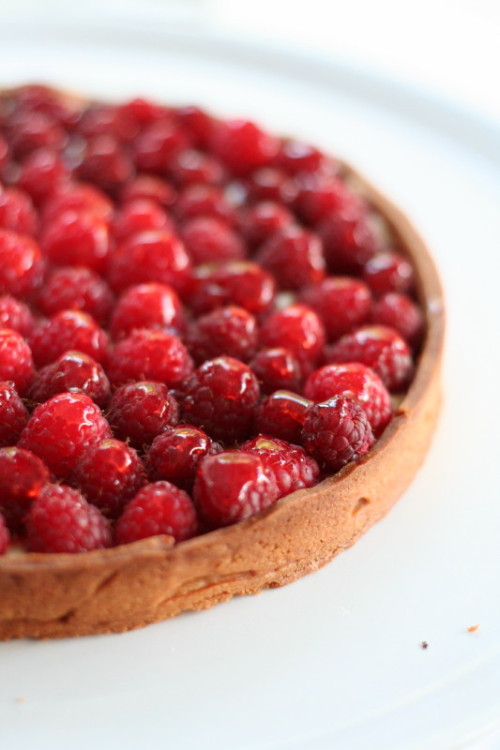
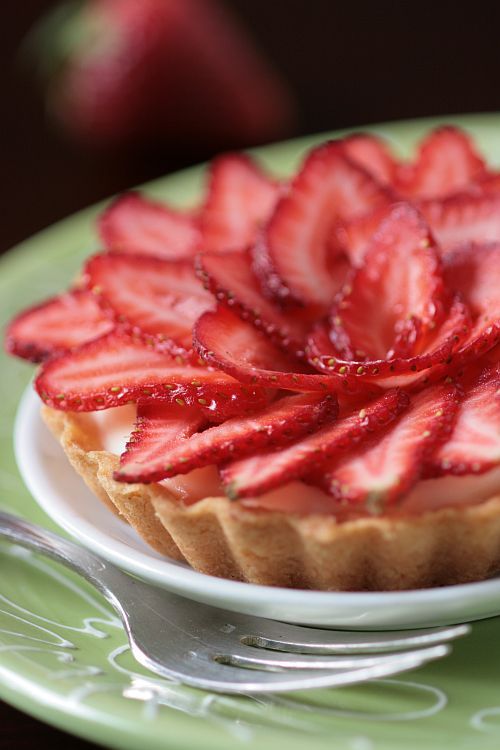
Tarte aux fraises (Strawberry tart)

1. Pie shell
Make a pre-baked pie shell, for instance using the recipe here. Instructions for blind baking it can be found here.

2. Crème pâtissière (pastry cream)
Source: Pierre Hermé, Secrets Gourmands

Ingredients
- 250g milk (1/4 liter)
- 23g corn starch
- 62g sugar (divided in two)
- 3 egg yolks
- 25g butter
- 1/2 to 1 vanilla bean

Place the corn starch and half the sugar in a saucepan with a thick bottom. Add the milk slowly while whisking. Split the vanilla bean, scrape seeds, and add bean + seeds to the milk. While whisking, bring to a boil.

In another saucepan, whisk the egg yolks with the remaining sugar, for three minutes. Pour in the milk and corn starch mixture in a thin stream, whisking continuously. Bring to a boil and remove from the fire as soon as you see the first big bubbles [I think mine could have boiled a little longer, it was too runny]. Remove the vanilla bean and immerse the saucepan in a ice cold water bath (put ice cubes and water in a big bowl).

Once the cream has cooled to 50°C, add the butter, turning quickly with a whisk. The butter should not be added when the cream is too hot (over 60°C), or the cream will be grainy and the butter will lose its fresh flavor.

You can flavor the cream with:
- Coffee [of course not for use with the strawberry tart]: add 2.5g instant coffee diluted in a teaspoon of water + 2.5g natural coffee extract
Or with 1 to 2 tablespoons of one of the following:
- Cointreau
- Grand Marnier
- Kirsch
- Old brown rhum ("agricole")
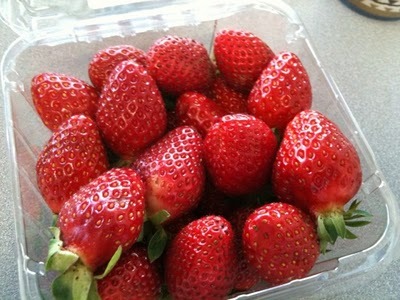
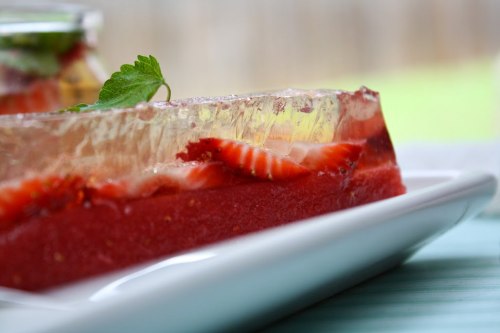
3. Strawberries
If the strawberries are clean, I wouldn't bother washing them. If they're sandy, rinse them quickly and dry them carefully.

4. Glaze
[I think you can simply make a glaze from currant jelly, boiling it with a little water. I didn't have any jelly in the house, so I had to make this glaze from scratch, which tasted very much of strawberries. This glaze keeps for up to a month in the fridge.]

Source: Pierre Hermé, Secrets Gourmands

Ingredients
- 250g strawberries
- 200g sugar
- 10g pectin ("Vitpris" in France) [I used instead a kind of sugar sold specifically for making jams, I assume it contains pectin. Yes I happen to have this sugar at home because I keep buying it by mistake instead of regular sugar! I was elated to find a use for it, though I still have close to a kg to get rid of...]
- 1 tspn lemon juice

Wash the strawberries, dry them, hull them, puree them with a blender [I used a Bamix immersion blender], filter through a sieve, then pour into a saucepan. Heat the puree, then add the sugar and the pectin. Bring to a boil. Boil for 2 minutes while removing foam carefully [I didn't]. Let it cool.
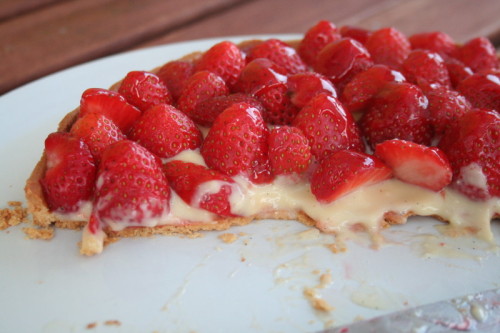
5. Assembly
Spread a thin layer of glaze on the baked crust. Let it dry for a few minutes. Then spread about 1 cm (more or less, depending on your preference) of crème pâtissière on the crust. If the strawberries are large, cut them in half. Place them decoratively [I crammed as many in as possible, not focusing too much on esthetics] in the tart shell, starting with the largest ones in the center and scaling down toward the edges. Brush with glaze using a brush. If the glaze is too thick, dilute it with a tspn or two of water. Serve as soon as possible.

raspberry tart

honey with raspberry ice cream


Raspberry Honey Ice Cream

1 quart raspberries
1/3 cup raspberry honey (or any honey will do)
2 cups heavy cream
1 cup half and half
1 tsp lemon juice
1- 1 ½ cups sugar (depending on how sweet your berries are)
3 egg yolks
¼ tsp salt

Directions:

Add the yolks,sugar and honey to a medium-size bowl. Whisk together and then set aside.

Using a double boiler over medium-low heat, add the half and half, cream, raspberries and salt. Regularly whisk the mixture, heating until the temperature reaches approximately 145F. The mixture should begin to turn purple.
Once the cream mixture has reached the desired temperature, slowly add about half of the mixture to the eggs and sugar while whisking vigorously. This will prevent the eggs from curdling. Once the eggs and cream have been thoroughly integrated, pour back the egg mix into the remaining cream.

Whisk constantly and slowly as the mix rises in temperature. Once the temperature has reached 165-170F -- or when the mix evenly coats the back of a spoon -- remove from heat and add the lime juice and vanilla. Whisk them in completely and run through a sieve to remove any raspberries seeds. Move to a new container to cool. The mix can be placed in the freezer for 2 to 3 hours or, preferably, into the refrigerator overnight.

Churn according to your ice cream maker's instructions. After churning, place in freezer to firm up. I recommend placing a seal of plastic wrap tight against the ice cream after making it to prevent a skin from forming on the ice cream's surface. Serve once firm enough.

Source: Adapted from My Husband Cooks

old fashioned waffles and strawberries and syrup


Old Fashioned Waffles

2 cups milk
1 tsp salt
3 eggs separated
2 1/4 c flour
3 tsp baking powder
100g butter, melted

Beat together milk, salt and egg yolks, mix flour and baking powder. Once combined, add the melted butter and beat until smooth. Leave to stand about 2 hours. Beat egg whites until stiff then fold into mix. Pour about 3/4 c of mix onto hot buttered waffle iron and close. Cook until golden brown. Makes 8-10 waffles.

waffle recipe from The Best of Annabel Langbein: Great Food For Busy Lives (revised and expanded edition)

babycakes


Miniature Devil’s Food Cake

La treccia di Cocozza


La treccia di Cocozza
Treccia dolce di Cocozza

Questa splendida ricetta non è farina del mio sacco, bensì della cara Cocozza. Quando ho visto la sua treccia russa soffice soffice, me ne sono subito innamorata. Io ho optato per un ripieno di semi di papavero, ma voglio provarla anche con un ripieno di noci o di altra frutta secca. Le temperature sono un po' scese, il forno può essere riacceso!!
Scusate se in questi giorni latito un po', vorrei venire a leggere tutti i vostri blog, ma sto passando delle giornate di fuoco. Recupererò, promesso!

Ingredienti

* mezzo cubetto di lievito di birra o una bustina di liofilizzato
* 200 ml di latte
* 90 gr di zucchero
* 90 gr di burro
* 2 uova
* 600 gr di farina
* 1 cucchiaino di sale
* 50 gr di burro, dello zucchero e 4-5 cucchiai di semi di papavero per il ripieno

Preparazione: fare un lievitino sciogliendo il lievito nel latte e aggiungere tanta farina fino a che non diventa una crema densa. Coprire con un po' di farina e lasciare lievitare finché non avrà fatto tante bolle (una mezz'oretta circa).
Al lievitino aggiungere gli altri ingredienti e lavorare, poi lasciarlo lievitare un'oretta circa. Riprendere l'impasto e stenderlo a rettangolo su una spianatoia e spalmarci burro, zucchero e semi di papavero. Rotolarlo e farci un taglio lasciando un po di spazio all'inizio. Avvolgerlo come un torciglione metterlo in uno stampo da plum cake imburrato e farlo lievitare un'altra oretta. Infornare a 180° per circa 40 minuti.

Treccia dolce di Cocozza

Deutsche Ecke
Russischer Hefezopf

Zutaten

* 1/2 Hefewürfel
* 200 ml Milch
* 90 g Zucker
* 90 g Brutter
* 2 Eier
* 600 g Mehl
* 1 TL Salz
* 50 g Butter, etwas Zucker und 4-5 EL Mohn für die Füllung

Zubereitung: Die Hefe in der Milch auflösen und soviel Mehl hinzugeben, bis ein dickflüssiger Teig entsteht. Mit etwas Mehl bedecken und so lange gehen lassen, bis der Vorteil Blasen schlägt (ca. eine halbe Studen).
Dem Vortei alle anderen Zutaten (außer Füllung!) hinzugeben und gut kneten. Circa 1 Stunde gehen lassen. Den Teig auf einer bemehlten Arbeitsfläche zu einem Rechteck ausrollen, die Butter, etwas Zucker und den Mohn darüber verteilen. Das Rechteck längs rollen, in der Mitte längs durchschneiden, wobei das obere Ende zusammen bleiben soll. Die zwei Teile zu einem Zopf rollen. In eine gebutterte Kastenform geben und eine weitere Stunde gehen lassen. Im vorgeheizten Ofen bei 180° ca. 40 Minuten backen. Die Mengen ergeben zwei kleine Zöpfe.

Postato da Alex

Tuesday, May 11, 2010

Spaghetti with Strawberries


Spaghetti With Strawberries
From Sfoglia Restaurant

Ingredients

1 pound good-quality dried spaghetti (like Setaro)
4 tablespoons extra-virgin olive oil, plus more for finishing
1 pound ripe strawberries, cleaned and halved
2 tablespoons good aged (eight-year-old) balsamic vinegar
1 cup San Marzano tomato purée
4 ounces reserved pasta water
Sea salt and freshly ground black pepper to taste
Freshly grated parmesan, for serving (optional)

Directions

1. Cook the pasta in rapidly boiling salted water until al dente.
2. In a large sauté pan, warm the olive oil and half of the strawberries over medium heat. Cook until the strawberries start to release juice. Add balsamic and reduce by half.
3. Add tomato purée, the rest of the strawberries, and the reserved pasta water, and reduce by half again until the sauce thickens. Season to taste.
4. Toss with spaghetti. Finish with olive oil and black pepper.

Monday, May 10, 2010

seedlings in newspaper

Maple Cardamon Mousse And Strawberry Tartelettes

Triple-Decker Decadence Cookies


Triple-Decker Decadence Chocolate Cookies

Ingredients

* 1/2 cup butter, softened
* 3/4 cup granulated sugar
* 1/4 cup packed dark brown sugar
* 1/2 teaspoon baking soda
* 1/8 teaspoon salt
* 1/8 teaspoon ground black pepper
* 1 egg
* 2 teaspoons vanilla
* 1-1/3 cups all-purpose flour
* 1/2 cup unsweetened cocoa powder
* Chocolate Ganache

1. In a large bowl, beat butter with an electric mixer on medium to high speed for 30 seconds. Add sugars, baking soda, salt, and pepper; beat until combined, scraping bowl occasionally. Beat in egg and vanilla until combined.

2. In a small bowl, whisk together flour and cocoa powder. Gradually beat or stir into egg mixture. Divide dough into two portions. Shape each portion of dough into a 1-1/2-inch-diameter log (about 8 inches long). Wrap each log in plastic wrap and chill for 1 hour or freeze for 30 minutes or until firm enough to slice.

3. Preheat oven to 350 degrees F. Working with one roll at a time, unwrap chilled dough and cut into slices about 1/4 inch thick. Place slices 2 inches apart on an ungreased cookie sheet.

4. Bake in the preheated oven for 8 minutes or until edges are set. Cool on cookie sheet for 1 minute. Transfer cookies to a wire rack; let cool.

5. For each three-cookie stack, spread 1 teaspoon Chocolate Ganache evenly over the bottom side of one cookie. Top with a plain cookie, top side up. Spread with 1 teaspoon Chocolate Ganache. Top with another cookie, top side up. Pipe remaining Chocolate Ganache over tops of cookie stacks. Chill 30 minutes to set. Makes about 14 cookie stacks.

Chocolate Ganache: In a small microwave-safe bowl, combine 6 ounces chopped bittersweet chocolate and 1/3 cup whipping cream. Microwave on 100 percent power (high) for 1 minute. Stir until mixture is melted and smooth. Let stand about 30 minutes or until mixture thickens enough to spread. Makes about 1 cup.

To Store: Layer plain cookies between sheets of waxed paper in an airtight container; cover. Store at room temperature for up to 3 days or freeze for up to 3 months. Thaw cookies, if frozen, before stacking and serving. Or store stacks in an airtight container in the refrigerator for up to 2 days.

Followers

Blog Archive

About Me

links and pics from other sites. content is NOT by me. i just have links here for my own benefit (to find and retrieve later). i have (probably) not tried any of the recipes posted, and most certainly have not taken any of the photos posted. credit is given when found. if ive linked to something thats yours and you want me to remove it, let me know and i will remove it.